A quality leather bag is more than just an accessory; it’s a companion on your daily journey, a piece that gathers stories and character over time. At Beldtura Leather, we cherish the unique patina that develops on full-grain, vegetable-tanned leather. However, we also understand the desire for renewal and personalization. Whether you’re reviving a faded favorite or customizing a pre-loved find, dyeing a leather bag is a rewarding project that breathes new life into a classic piece. This comprehensive guide will walk you through the process, ensuring a beautiful, professional-looking result that honors the craftsmanship of the original item.
Before You Begin: What Should You Consider When Coloring a Leather Handbag?
Before you purchase any supplies, a careful assessment is crucial for success. Not all leather is created equal, and the type and condition of your bag will dictate the outcome. Taking a moment to consider these factors will save you from potential disappointment.
First, identify the type of leather. This process works best on smooth, finished leathers, like the kind used in many high-quality totes and messenger bags. Suede, nubuck, or patent leathers require different processes and are not suitable for this method. Second, evaluate the bag’s original color. A fundamental rule of dyeing is that you can only dye a color darker than the original. You cannot dye a black bag light tan, but you can certainly transform a beige bag into a rich chocolate brown or a deep navy. Finally, and most importantly, perform a spot test. Choose an inconspicuous area, such as the underside of a flap or inside a pocket, to test the leather preparer and the dye. This will show you how the leather reacts and give you a true preview of the final color.
What Supplies are Necessary for Leather Bag Dyeing?
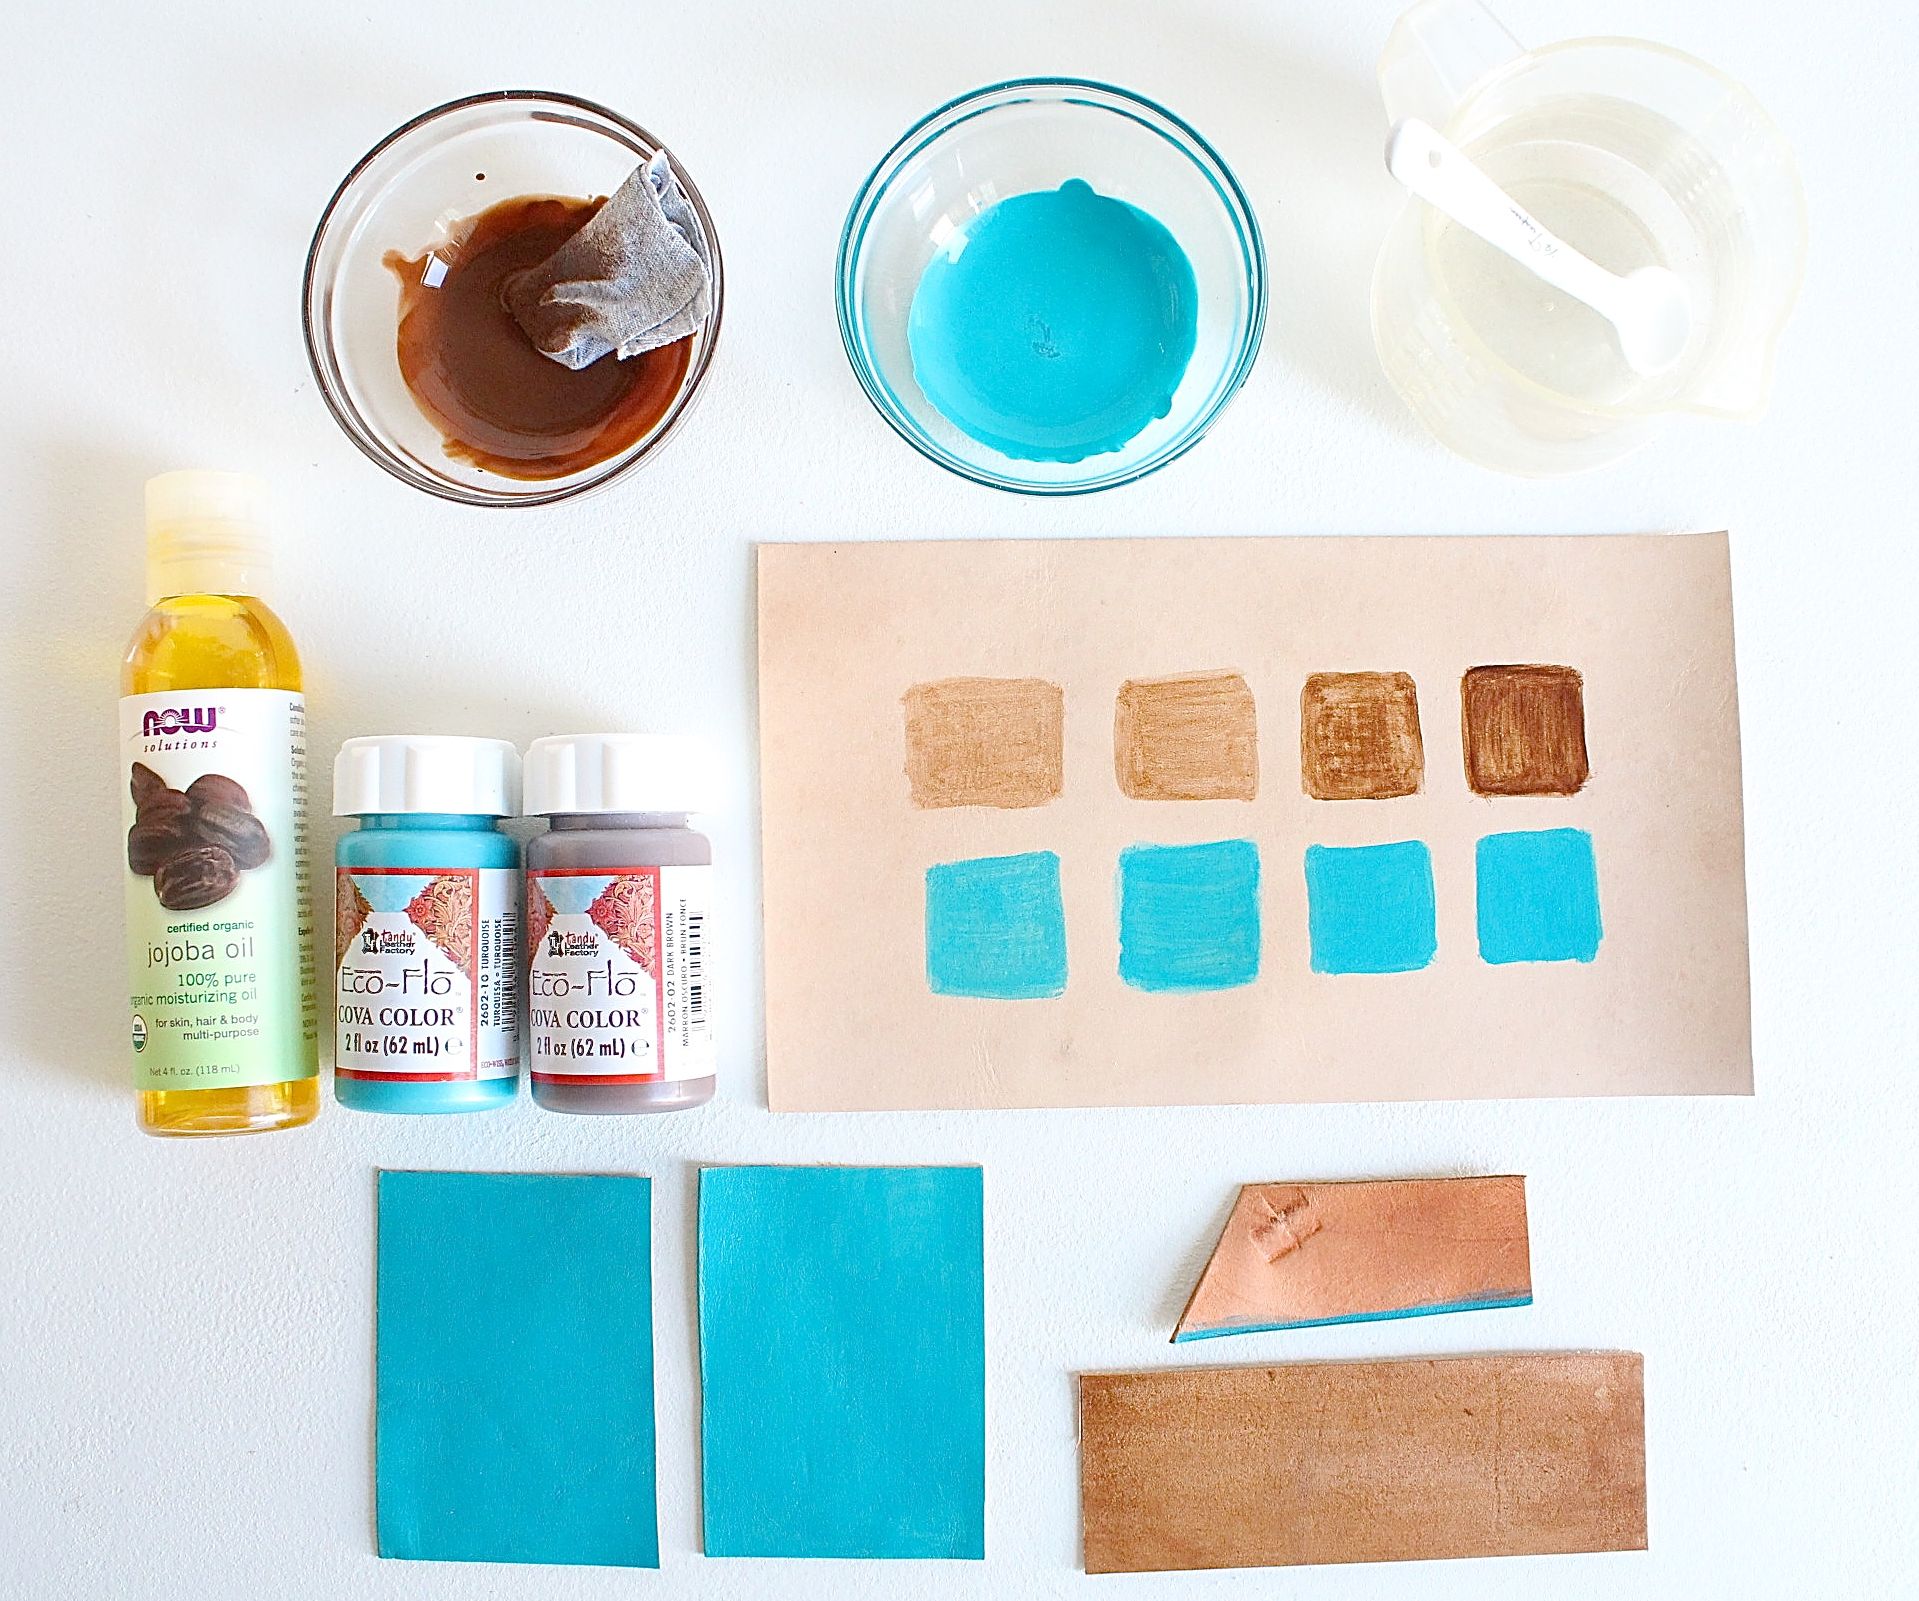
Gathering the correct tools beforehand will make the entire process smoother and more enjoyable. Think of it as preparing a chef’s kitchen before cooking a gourmet meal—every item has its purpose. Most of these supplies can be found at craft stores or specialized leather supply shops.
| Item | Purpose | Notes |
|---|---|---|
| Leather Preparer & Deglazer | Strips the factory finish, wax, and oils from the leather. | This is a critical, non-negotiable step for proper dye absorption. |
| Professional Leather Dye | The coloring agent. | Choose a spirit-based or oil-based dye specifically for leather. |
| Wool Daubers or High-Density Sponge | For applying the dye evenly. | Daubers are excellent for control and detail work. |
| Leather Conditioner | Restores moisture and flexibility to the leather after dyeing. | Look for a quality conditioner with natural oils like neatsfoot oil. |
| Leather Sealant/Finisher | Seals the color and provides a protective top coat. | Available in matte, satin, or gloss finishes. |
| Nitrile Gloves | Protects your hands from chemicals and dye. | Essential for safety and to prevent stained skin. |
| Soft, Lint-Free Cloths | For cleaning, buffing, and applying products. | Old cotton t-shirts work perfectly. |
| Painter’s Tape | To protect hardware like buckles, zippers, and clasps. | Take your time with this for a clean, professional look. |
| Newspaper or Drop Cloth | To protect your work surface. | Dye can be permanent, so cover your area thoroughly. |
How Can You Dye a Leather Bag? A Step-by-Step Tutorial
With your materials gathered and your workspace prepared, it’s time to begin the transformation. Work patiently and methodically. The beauty of working with leather is that it rewards careful, deliberate craftsmanship.
Step 1: Thoroughly Prepare Your Workspace and Bag
Lay down your newspaper or drop cloth in a well-ventilated area. Remove any contents, straps, or tassels from your bag. Use painter’s tape to meticulously cover all metal hardware. You cannot be too careful with this step. Once protected, give the entire bag a wipe-down with a clean, slightly damp cloth to remove any surface dust or dirt.
Step 2: Strip the Original Finish
Put on your nitrile gloves. Dampen a clean, lint-free cloth with the Leather Preparer & Deglazer. Working in small, circular motions, rub the entire surface of the bag. You will see color and finish coming off onto your cloth; this is normal. It means you are successfully removing the protective top coat, which will allow the new dye to penetrate the leather’s pores evenly. Continue until the entire surface has a uniform, slightly dull appearance. Allow the bag to dry completely, typically for about 30 minutes.
Step 3: Skillfully Apply the Leather Dye
Shake the leather dye bottle well. Pour a small amount into a shallow dish. Dip your wool dauber into the dye, dabbing off any excess. Apply the dye to the leather in long, even strokes, starting with the less visible areas first. For a consistent finish, it’s often best to work in light, circular motions, overlapping each circle slightly. The key is to apply thin coats. A heavy, saturated application will result in a blotchy, uneven finish. Pay close attention to seams, edges, and creases. Let the first coat dry completely according to the manufacturer’s instructions (usually 1-2 hours).
Step 4: Buff and Assess for a Second Coat
Once the first coat is dry, take a clean, dry cloth and gently buff the entire surface. This removes any excess pigment that didn’t absorb and helps even out the color. Now, assess the result. If the color is lighter than you desire or appears slightly streaky, it’s time for a second coat. Apply the second coat using the same technique as the first, ensuring it is thin and even. Most projects will require two coats for a rich, deep color.
Step 5: Condition the Revitalized Leather
The dyeing process, especially the deglazing step, removes essential oils from the leather. Rehydrating the material is paramount to its long-term health and flexibility. After the final dye coat is completely dry (we recommend waiting at least 24 hours), apply a quality leather conditioner. Use a clean cloth to work a small amount of conditioner into the leather in gentle, circular motions. High-quality, full-grain leather will drink it in. Let the conditioner absorb for several hours or overnight, then buff off any excess with a new clean cloth.
Step 6: Seal for Longevity and Protection
The final step is to lock in your beautiful work. Applying a leather sealant, or finisher, protects the dye from rubbing off onto your clothes and provides a layer of resistance against moisture and scuffs. Apply a thin, even coat of the sealant with a clean cloth or sponge, following the product’s directions. Allow it to dry completely—this can take up to 24-48 hours. Once dry, your bag is not only beautifully transformed but also protected for its next chapter.
What are Some Common Pitfalls to Avoid When Coloring Leather?
Even with the best intentions, mistakes can happen. Being aware of common errors can help you sidestep them for a flawless finish.
- Skipping the Deglazer: The most common mistake is failing to properly strip the original finish. If the dye can’t penetrate, it will sit on the surface, resulting in a sticky, uneven, and non-durable color that will easily rub off.
- Applying Dye Too Heavily: A thick, single coat of dye is a recipe for a blotchy finish. Thin, multiple coats are always superior, allowing for better control and a more uniform color.
- Forgetting to Condition: Skipping the conditioner will leave your bag’s leather feeling dry, stiff, and brittle. This can lead to cracking over time, undermining the very goal of revitalizing your accessory.
- Rushing the Drying Times: Patience is a virtue in leatherwork. Applying a new coat of dye, conditioner, or sealant before the previous layer is fully dry can ruin the entire project, creating a gummy mess.
How Do You Maintain Your Newly Dyed Leather Bag?
Your work doesn’t end after the final sealant has dried. Proper care will ensure your newly colored bag remains a staple in your wardrobe for years to come. Just like any of our Beldtura Leather pieces, a bit of regular maintenance goes a long way.
Keep your bag clean by wiping it down with a dry cloth periodically. For minor spills, use a slightly damp cloth. Avoid harsh chemical cleaners at all costs. Every 6-12 months, depending on use and climate, apply a light coat of the same leather conditioner you used after dyeing. This will keep the leather supple and prevent it from drying out. When not in use, store your bag in a dust bag and away from direct sunlight or extreme temperatures to prevent the color from fading.
By following these steps, you’ve done more than change a color; you’ve engaged in an act of restoration and personalization. You’ve given a well-loved item a new lease on life, a practice that resonates deeply with our philosophy of creating timeless, durable goods meant to last a lifetime. Happy dyeing!