The secret to closing a gift bag is the fold-over method. Crease the sides, fold the top down twice, punch holes, and thread a ribbon for a clean look.
Table of Contents
- Why Does a Perfectly Closed Gift Bag Matter?
- The Secret Fold: A Step-by-Step Method for a Flawless Finish
- Beyond the Basics: Elevating Your Gift Bag Presentation
- Common Mistakes to Avoid When Sealing a Gift Bag
- Frequently Asked Questions
Why Does a Perfectly Closed Gift Bag Matter?
The way a gift is presented is the first part of the experience. It builds anticipation and communicates the care and thought you put into the moment. A sloppy, open-topped gift bag with overflowing tissue paper can detract from the beautiful item inside. Conversely, a neatly and creatively closed bag elevates the entire gift, making it feel more special and intentional. It shows respect for both the recipient and the gift itself.
When you’ve chosen a premium present, such as a timeless Beldtura full-grain leather wallet, the packaging should match its quality. A crisp, professional presentation transforms a simple bag into a sophisticated package, promising that something wonderful is waiting inside. This attention to detail turns a gift exchange into a memorable event.
The Secret Fold: A Step-by-Step Method for a Flawless Finish
Forget the chaotic tissue paper explosion. This method creates a clean, sealed top that looks like it was done by a professional. It’s a simple technique that yields stunning results, keeping your gift secure and hidden until the big reveal.
What You’ll Need
Before you begin, gather a few simple tools. Having everything on hand makes the process smooth and effortless.
- Your gift bag
- The gift
- Optional: A small amount of tissue paper
- A hole punch
- Ribbon or twine
- Optional: A decorative sticker or wax seal
Step 1: Prepare the Bag and Gift
Start by placing your gift inside the bag. If the item is delicate or you want to add a bit of cushion, place a single, neatly folded piece of tissue paper at the bottom before putting the gift in. Ensure the gift sits flat and centered. Remove the handles from the bag by pulling the knots through the holes; this prevents them from getting in the way. You can easily re-thread them at the end.
Step 2: Create Crisp Creases
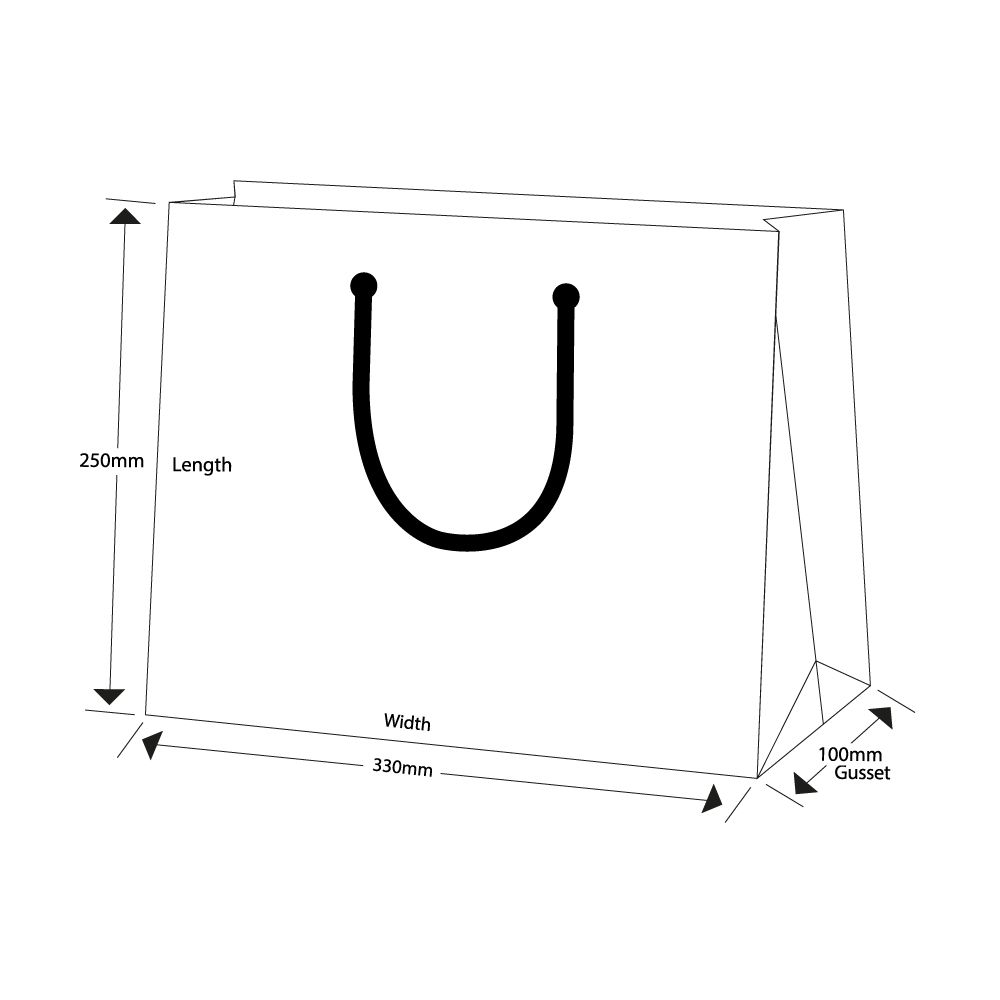
This is the most crucial part of achieving a sharp look. Stand the bag up and gently push the sides inward along their natural folds, just as they were when you bought the bag. This creates two V-shaped indents on either side. Run your finger along these creases to make them more defined. This step narrows the top of the bag, making it much easier to fold neatly.
Step 3: The Fold-Over Technique
With the sides creased inward, the top of the bag should now be flat. Press the front and back of the bag together firmly. Next, fold the top edge down about one to two inches, depending on the size of the bag. Make a sharp crease. For an even more secure and polished look, fold it down a second time. This double fold adds weight and structure, ensuring the top stays flat and closed.
Step 4: Securing Your Masterpiece
With the top folded down, you have several options for securing it. Each provides a different aesthetic. The most professional method involves a hole punch and ribbon. Punch two holes, evenly spaced, through all the folded layers. Thread your chosen ribbon through the holes, from front to back, and tie it in a neat bow or a simple, elegant knot. Re-insert the bag’s handles through their original holes.
For a quicker alternative, you can use a high-quality sticker or even a wax seal to hold the fold in place. This works best on smaller bags where the fold is less likely to spring open.
| Securing Method | Pros | Cons | Best For |
|---|---|---|---|
| Hole Punch & Ribbon | Highly secure, professional, and customizable. | Requires extra tools (hole punch). | Medium to large bags; creating an elegant look. |
| Decorative Sticker | Quick, easy, and adds a pop of design. | Less secure; may not hold on heavy bags. | Small bags or lightweight gifts. |
| Wax Seal | Unique, vintage, and very personal. | Requires a wax kit; can be messy. | Special occasions where a dramatic touch is desired. |
Beyond the Basics: Elevating Your Gift Bag Presentation
Once you have mastered the fold-over method, you can add further layers of personalization and style. These small touches distinguish your gift and show an exceptional level of thoughtfulness.
Choosing the Right Ribbon
The ribbon is more than just a fastener; it’s a key decorative element. Think about texture and color. A satin ribbon offers a classic, glossy finish, while a grosgrain ribbon provides a more modern, textured look. For a rustic or organic feel, consider using natural jute twine or a strip of fabric. Match the ribbon color to the bag’s design or choose a contrasting color to make it stand out.
Adding Embellishments and Tags
Small additions can make a big impact. Tuck a sprig of fresh greenery, like eucalyptus or rosemary, under the ribbon for a fragrant, natural touch. A high-quality gift tag is essential for adding your message. For an extraordinary presentation, tie a small, complementary item to the outside. Imagine pairing a sophisticated bag with a small, elegant Beldtura leather keychain as part of the exterior decoration—it acts as both an embellishment and a bonus gift.
What About Tissue Paper?
While this method is designed to eliminate the need for messy, overflowing tissue paper, you can still incorporate it tastefully. Instead of having it puff out of the top, use one or two sheets to wrap the gift inside the bag. This adds another layer to the unwrapping experience and protects the item. The exterior of the bag remains clean and streamlined, preserving the surprise until the ribbon is untied.
Common Mistakes to Avoid When Sealing a Gift Bag
Achieving a perfect finish means avoiding a few common pitfalls. First, do not overfill the bag. An overstuffed bag will bulge and be impossible to fold neatly. Choose a bag that gives your gift at least a few inches of clearance at the top. Second, be sure to make your folds as crisp as possible. A soft, rounded fold will look unintentional and sloppy. Use a ruler or the edge of a book to press down the crease if needed. Finally, ensure your hole punches are symmetrical. An off-center ribbon can make the entire presentation look unbalanced.
Frequently Asked Questions
How do you close a gift bag without a ribbon?
You can use a stylish binder clip, a decorative clothespin, or a high-quality sticker placed in the center of the fold. These options are quick and still provide a much neater look than leaving the top open.
What’s the best way to hide the gift inside the bag?
The double fold-over method is the best way to completely conceal the gift. By folding the top of the bag down twice, you create an opaque, flat seal that prevents anyone from peeking inside. Wrapping the gift in a sheet of tissue paper first provides an additional layer of concealment.
Can this method work for bags of all sizes?
Yes, this technique is versatile and works for everything from small jewelry bags to large bags for clothing or books. The key is to adjust the width of your folds in proportion to the bag’s size. For very large bags, a wider fold (2-3 inches) looks more balanced.