Learn to style tissue paper in a gift bag by placing the gift inside, then layering, folding, or ‘poofing’ sheets of paper around it for a full look.
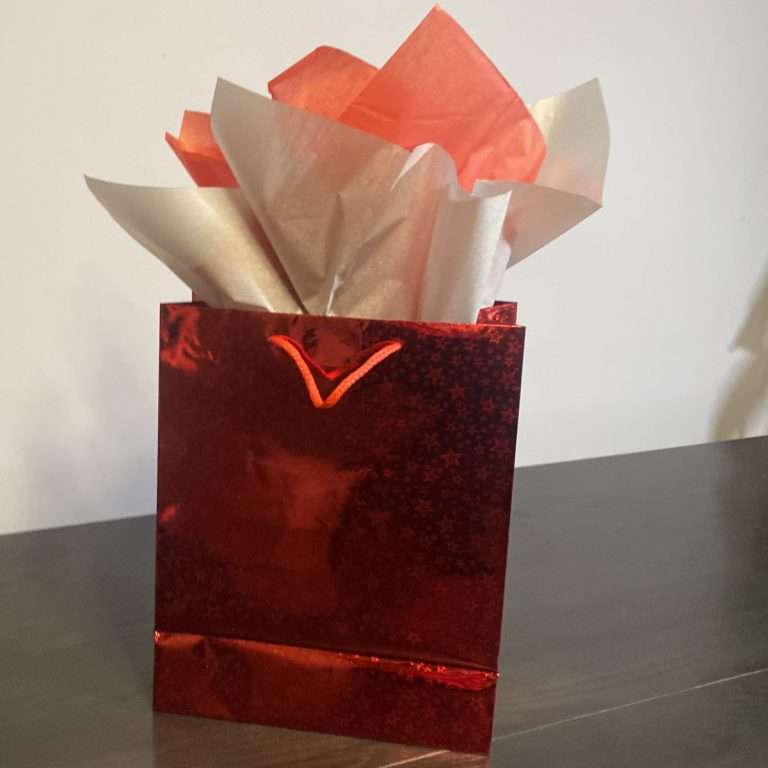
Table of Contents
- Why Perfect Gift Bag Presentation Matters
- Getting Started: What You’ll Need
- Master the Fundamentals: Three Classic Tissue Paper Techniques
- Advanced Styling: How to Elevate Your Gift Bag
- Pro Tips for a Flawless Finish
- Common Mistakes to Avoid When Using Tissue Paper
Why Perfect Gift Bag Presentation Matters
The art of gift-giving extends beyond the item itself; it’s an experience. The anticipation built by elegant presentation is part of the joy. A thoughtfully arranged gift bag signals care and attention to detail, transforming a simple exchange into a memorable moment. When you’ve chosen a special gift, such as a beautifully crafted Beld’t Ura Leather wallet, its wrapping should reflect its quality and the sentiment behind it. A crisp, artfully arranged cascade of tissue paper elevates the entire experience, showing the recipient that you took the time to make every detail perfect.

Proper presentation does more than just conceal the gift. It adds an element of surprise and luxury, making the act of unwrapping more satisfying. It protects the item inside, cushioning it securely until it’s ready to be revealed. Ultimately, a well-styled gift bag demonstrates that the giver values both the gift and the person receiving it.
Getting Started: What You’ll Need
Before you begin, gathering a few simple materials will ensure the process is smooth and the results are professional. Having everything on hand allows you to focus on the creative styling. You won’t need much to achieve a polished look, but the quality of your materials can make a noticeable difference.
Here is what you will need:
- The Gift Bag: Choose a bag that is appropriately sized for your gift. It should be large enough to hold the item comfortably with a few inches of clearance on all sides and at the top.
- Tissue Paper: Select 3 to 5 sheets of tissue paper per bag. Using an odd number often creates a more visually appealing and fuller arrangement. Consider colors that complement the gift bag or the occasion.
- The Gift: Your carefully chosen present. For delicate items, ensure the bag offers enough structure. A handsome Beld’t Ura Leather belt, for instance, holds its shape well and is easy to position.
- Optional Embellishments: A gift tag, ribbon, or a small ornament can add a final personal touch to the bag’s handles.
Master the Fundamentals: Three Classic Tissue Paper Techniques
There are several ways to arrange tissue paper, each creating a distinct aesthetic. Mastering these three fundamental methods will equip you to style a gift bag for any occasion, from birthdays to formal celebrations. Each technique is simple to learn and delivers impressive results.
The Classic Pouf: Effortless Elegance
The “pouf” or “fluff” is perhaps the most popular and quickest method. It creates a full, festive look that erupts from the top of the bag, perfect for concealing the gift while adding volume and color.
- Place the Gift: Start by carefully setting your gift at the bottom of the bag, centered if possible.
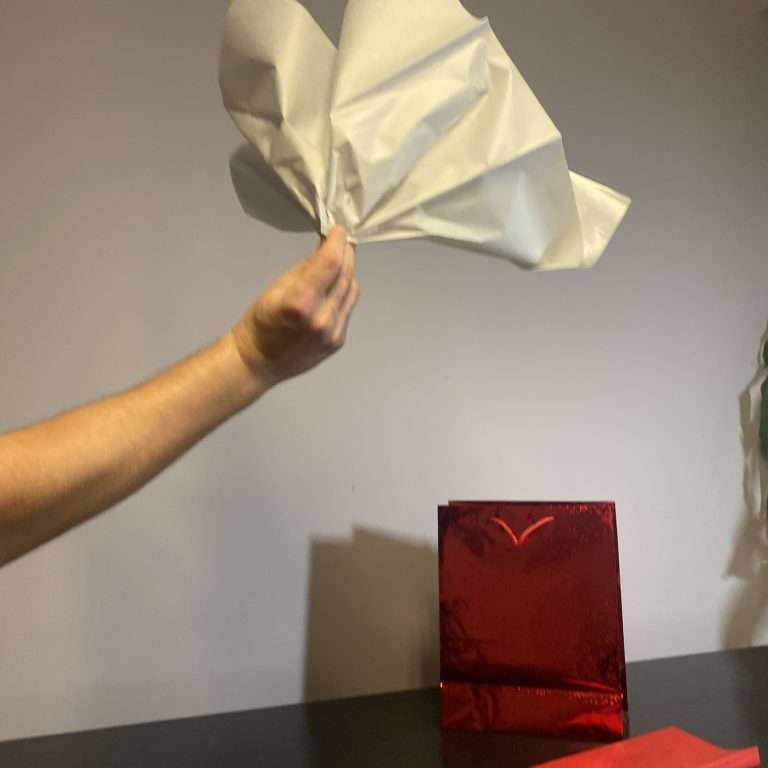
- Prepare the Tissue: Lay one sheet of tissue paper flat. Pinch it from the center and lift it, allowing the corners and edges to fall naturally downward, resembling a ghost-like shape.
- Insert and Arrange: Gently place this “pouf” into one corner of the bag, with the pinched center pointing down and the fluffy edges fanning out at the top.
- Repeat for Fullness: Repeat this process with your remaining sheets of tissue paper, placing each pouf in a different corner or area of the bag. Adjust and fluff the top edges until the gift is concealed and the arrangement looks balanced and full.
The Folded Flap: Clean and Modern
For a sleeker, more structured appearance, the folded flap method is an excellent choice. This technique creates clean lines and a tidy finish, ideal for corporate gifts or for anyone who appreciates a minimalist aesthetic.
- Layer the Sheets: Stack your 3-5 sheets of tissue paper on top of each other. For a dynamic look, stagger the sheets by about an inch so that multiple colors are visible along the edge.
- Wrap the Gift: Place your gift in the center of the stacked sheets. If the gift is small, like a Beld’t Ura Leather cardholder, you can place it toward one end.
- Fold and Roll: Gently fold or roll the tissue paper around the gift, creating a neat bundle.
- Position in the Bag: Carefully slide the wrapped gift into the bag. The top edge of the tissue paper should extend a few inches above the bag’s rim. Create a crisp fold over one side of the bag’s edge, or allow both sides to stand up straight for a sharp, defined look.
The Layered Look: For Depth and Color
This technique is perfect for showcasing multiple colors or patterns. It involves inserting sheets one by one to build a rich, textured arrangement that guides the eye inward.
- Position the Gift: As always, begin by placing your gift at the bottom of the bag.
- Fold the First Sheet: Take one sheet of tissue paper and fold it in half.
- Create a “U” Shape: Place the folded sheet into the bag so that it lines one of the wider sides, with the folded edge at the bottom. The two ends should stick out of the top.
- Layer and Rotate: Take your second sheet, fold it in half, and place it in the bag perpendicular to the first sheet, lining the narrower side. Continue this process, alternating sides, until all your sheets are used. Fluff the top edges to create a full and vibrant display of overlapping colors.
Advanced Styling: How to Elevate Your Gift Bag
Once you are comfortable with the basics, you can incorporate more advanced techniques to give your gift bags a truly custom and high-end feel. These small adjustments can make a significant impact on the final presentation.
Creating a Two-Tone Effect
Using two complementary colors of tissue paper can add remarkable visual interest. This works beautifully with any of the primary techniques. For the pouf method, simply hold two different colored sheets together when you pinch and lift from the center. For the folded flap or layered look, alternate colors as you stack or insert them. The contrast between a neutral and a bold color, or two harmonious shades, adds a layer of sophistication.
What Is the Best Way to Handle Large or Awkwardly Shaped Gifts?
Not all presents fit neatly into a bag. For larger items or those with unusual shapes, the key is to create a soft, protective “nest” at the bottom of the bag. Crumple a few sheets of tissue paper loosely and place them underneath and around the gift to provide cushioning and stability. Then, use one of the classic techniques with fresh, crisp sheets of tissue to style the top of the bag. This ensures the gift is secure and the presentation remains flawless, regardless of what’s inside.
Pro Tips for a Flawless Finish
A few insider tricks can help you achieve a professional-quality presentation every time. Keep these points in mind as you prepare your next gift.
- Use Enough Paper: Skimping on tissue paper is a common mistake. For most medium-sized bags, 3 to 5 sheets are ideal for achieving a lush, full look that properly conceals the gift.
- Embrace Imperfection: Especially with the pouf method, don’t overthink it. The beauty of this style is its effortless, slightly unarranged appearance. Fluff and adjust, but avoid trying to make every fold perfect.
- Pre-Fluff Your Poufs: Before placing them in the bag, give your tissue paper “poufs” a gentle shake to separate the layers and create more volume.
- Consider the “Handle Tuck”: For a very clean finish, you can gently tuck the corners of the outermost tissue layers behind the bag’s rope or ribbon handles. This keeps everything secure and contained.
- Match Tones: Coordinate your tissue paper color with the gift bag, the gift itself, or the theme of the occasion. A cohesive color palette always looks more polished and intentional.
Common Mistakes to Avoid When Using Tissue Paper
Knowing what not to do is just as important as knowing what to do. Avoiding these common pitfalls will ensure your gift presentation is always impeccable.
| Mistake | Solution |
|---|---|
| Wrinkled or Torn Paper | Always use fresh, crisp sheets of tissue paper. Pre-used or crumpled paper will detract from the overall look and make the presentation seem rushed. |
| Not Enough Volume | This usually happens from using too few sheets. If the bag looks sparse, add another one or two “poufs” to fill in the gaps and create a fuller appearance. |
| Gift is Visible | The purpose of the tissue is to create suspense. Make sure your arrangement is dense enough to fully conceal the gift from view at the top of the bag. |
| Paper is Too Short | Ensure the tissue paper is tall enough to stick out of the bag by at least 4-6 inches. If it sinks below the rim, the effect is lost. |