To make a hole in a leather belt, measure and mark the spot, then use a leather punch, drill, or an awl and hammer on a protected surface for a clean result.
Before You Begin: Essential Preparations
What Are the Best Tools for Adding a Belt Hole?
How Do You Make a Belt Hole Without a Dedicated Punch?
Comparing the Methods: Which is Right for You?
Finishing Touches: Ensuring Your Belt Stays Pristine
Why a Well-Fitting Belt is a Mark of Quality
Before You Begin: Essential Preparations
Proper preparation is the difference between a professional-looking adjustment and a costly mistake. Before you reach for any tool, taking a few moments to measure and mark precisely will ensure your newly adjusted belt fits perfectly and looks flawless. A well-cared-for leather belt is an investment, and this initial step protects its integrity and appearance.
Measuring for the Perfect Fit
The key to accurate placement is using the existing holes as your reference. Put the belt on and wear it as you normally would, noting which hole you currently use. The goal is to replicate the distance between the existing holes to maintain a consistent and clean look.
- Step 1: Lay the belt flat on a stable surface.
- Step 2: Use a ruler or a flexible measuring tape to measure the distance from the center of one hole to the center of the next. This is typically between three-quarters of an inch to one inch.
- Step 3: From the center of the last hole you need, measure out that same distance and make your mark. This will be the location for your new hole.
Marking the Spot Accurately
A visible and precise mark is crucial for guiding your tool. A sloppy mark leads to a misplaced hole. Choose a marking tool that is easy to see on your belt’s surface but also easy to remove afterward. A silver pen (for dark leather), a pencil, or a piece of chalk are all excellent options. Make a small, clear dot exactly where the center of the new hole should be. Double-check your measurement one last time before proceeding to the next step.
What Are the Best Tools for Adding a Belt Hole?
Several tools can create a new hole in your leather belt, each offering different levels of precision and ease. The method you choose depends on the tools you have available and the quality of finish you desire. For a premium, full-grain leather belt, using the right tool is paramount to preserving its structure.
Method 1: The Leather Punch (The Professional’s Choice)
A rotary leather punch is, without question, the superior tool for this job. It is specifically designed to create clean, perfectly round holes in leather without fraying or damaging the material. These tools feature a rotating wheel with multiple punch sizes, allowing you to match the new hole to the existing ones perfectly.
How to use a leather punch:
- Select the size: Rotate the wheel on the punch to the size that matches the original holes on your belt.
- Position the punch: Open the jaws of the punch and place it over the mark you made. Ensure the punch is perfectly perpendicular to the belt to avoid an angled hole.
- Squeeze firmly: Squeeze the handles together with firm, steady pressure. You will feel a distinct “pop” as the punch cuts through the leather.
- Check your work: Release the handles and admire the crisp, clean hole. The small piece of leather, or “chad,” will be collected by the tool.
Method 2: Using a Power Drill (A Practical Alternative)
If you don’t own a leather punch, a power drill is a highly effective alternative. With a sharp bit and a steady hand, you can achieve a result that is nearly as clean as a dedicated punch. The key is to secure the belt and control the drill’s speed.
How to use a power drill:
- Choose the right bit: Select a standard drill bit that matches the diameter of the existing holes. A brad-point bit is ideal as its sharp tip prevents “walking” or slipping on the leather surface.
- Secure the belt: Place a piece of scrap wood or a cutting mat underneath the belt. This protects your work surface and supports the leather, ensuring a cleaner cut on the exit side. Hold the belt firmly in place.
- Drill the hole: Align the tip of the drill bit with your mark. Start the drill slowly to create an initial indentation. Once the bit is set, increase the speed and apply gentle, even pressure until the bit passes completely through the leather and into the wood block below.
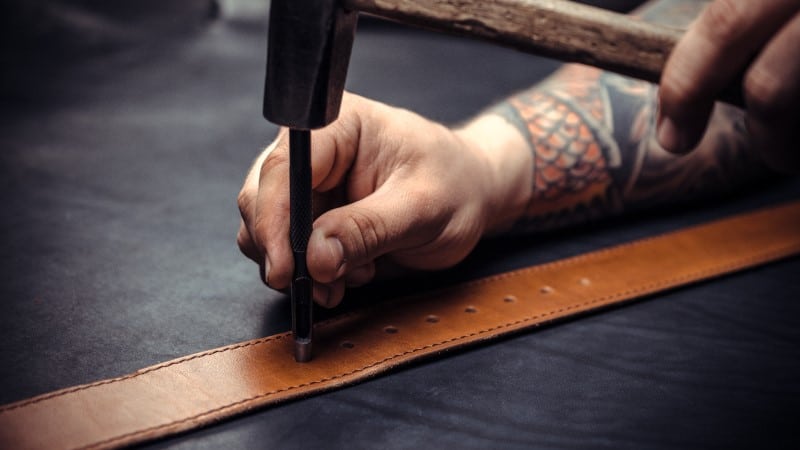
Method 3: The Awl or Nail Technique (The DIY Approach)
For situations where you lack specialized tools, a sharp awl or even a sturdy nail can be used. This method requires more patience and care, as it pierces the leather by stretching the fibers rather than cutting them. It’s functional but can result in a less polished look compared to the other methods.
How to use an awl or nail:
- Protect your surface: Just as with the drill, place the belt on a self-healing cutting mat or a block of scrap wood.
- Position the tool: Place the sharp point of the awl or nail directly on your mark.
- Apply pressure: Using a hammer or a mallet, gently but firmly tap the back of the tool. Use a series of controlled taps rather than one forceful blow. This gives you more control and reduces the risk of slipping or creating a jagged hole.
- Widen the hole: Continue tapping until the tool has passed through the leather. You may need to work the tool in a circular motion to slightly widen the hole to the desired size.
How Do You Make a Belt Hole Without a Dedicated Punch?
What if you find yourself without a leather punch or power drill? While not ideal, it is still possible to add a hole using common household items. The most reliable method in this scenario is the previously mentioned awl or nail technique. It provides the most control and the cleanest result among tool-free options.
Some may be tempted to use a sharp knife or scissors. This is strongly discouraged. Attempting to carve or cut a hole with a blade is extremely dangerous and almost always results in a jagged, oblong hole that can easily tear. It can ruin the aesthetic of the belt and compromise the leather’s strength around the new hole. For the safety of both you and your belt, sticking to a piercing tool like a nail is a much safer and more effective approach.
Comparing the Methods: Which is Right for You?
To help you decide, here is a direct comparison of the different techniques for adding a hole to your leather belt.
| Method | Result Quality | Ease of Use | Safety Risk |
|---|---|---|---|
| Leather Punch | Excellent (Clean, sharp, perfectly round) | Very Easy | Low |
| Power Drill | Very Good (Clean, minor fraying possible) | Moderate | Moderate |
| Awl or Nail | Fair (Can stretch fibers, less sharp) | Moderate | Moderate |
| Knife or Scissors | Poor (Jagged, high risk of tearing) | Difficult | High (Not Recommended) |
Finishing Touches: Ensuring Your Belt Stays Pristine
After successfully creating the new hole, a small finishing touch can make a significant difference, especially on high-quality leather. The process of punching or drilling can expose raw, unfinished leather inside the hole. To protect it and help it blend in with the rest of the belt, consider applying a small amount of leather conditioner or a touch of beeswax to the inside edge of the new hole. Use a cotton swab to apply it carefully. This seals the fibers, prevents them from drying out or fraying, and ensures your adjustment lasts as long as the belt itself.
Why a Well-Fitting Belt is a Mark of Quality
A belt that fits correctly does more than just hold up your trousers; it completes your look and protects the leather from unnecessary stress. When a belt is too loose or too tight, it places strain on the single hole being used, which can cause stretching and premature wear over time. This is especially true for premium materials. A Beldtura Leather belt, crafted from robust full-grain leather, is designed to mold to your body and last for years. Ensuring a proper fit by adding a new hole when necessary is an act of preserving that quality and craftsmanship. It ensures the tension is distributed correctly, maintaining the belt’s shape, integrity, and timeless appeal for its entire lifespan.